First Week Report
Teamviewer Setup
In order to access the remotely available NodeMCU and the Raspberry Pi in Lablua, TeamViewer Software is required to be installed in the Ubuntu system.
To install Teamviewer on Ubuntu system, follow these steps:
- Download the Teamviewer DEB package from here
If uncertain, pick the 64-bit package.
- Open the teamviewer_13.x.yyyy_amd64.deb file with a double click.
- The Teamviewer installation package will open in the ubuntu software center.
- Click on the Install button.
- The Authenticate dialog box will open.
- Enter the administrative password.
- Click on the Authenticate button.
- Teamviewer will be installed.
- The status within the Ubuntu Software Center changes to Installed.
- Teamviewer is installed on your Ubuntu system and can be started from menu.
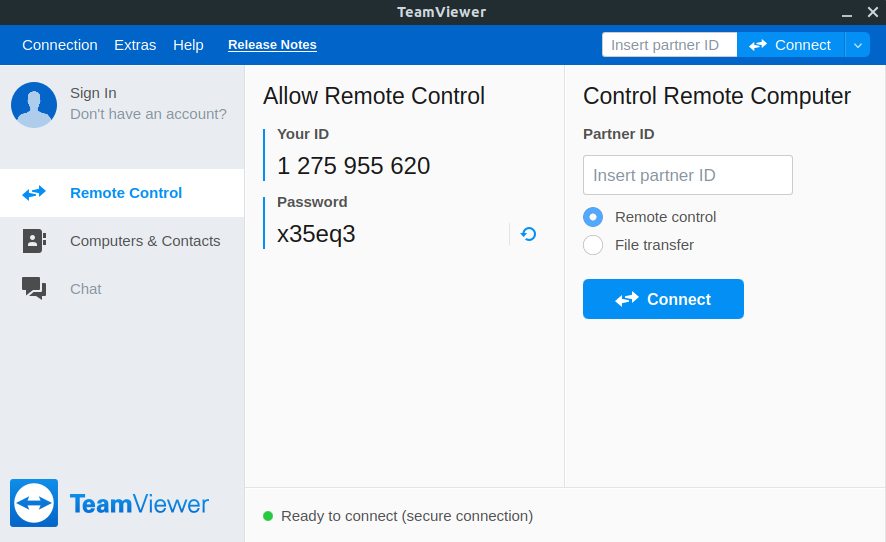
The following window will open when you will start TeamViewer:
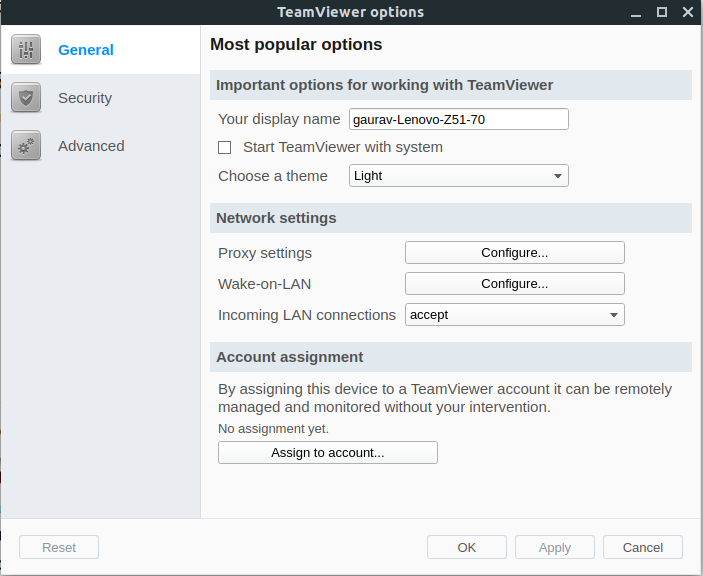
In order to change the proxy settings, just navigate to extras>options and configure proxy settings, same is depicted in the following image:
ESPlorer - NodeMCU test lua scripts
To run lua programs on a NodeMCU device i.e. ( ESP8266 based NodeMCU chip ), we are using ESPlorer IDE which can be downloaded and installed from this website
- After successfull installation of ESPlorer, navigate to the folder containing the ESPlorer source files and open a terminal window in the same folder.
- Run the following command on the terminal to start the ESPlorer program:
$ sudo java -jar ESPlorer.jar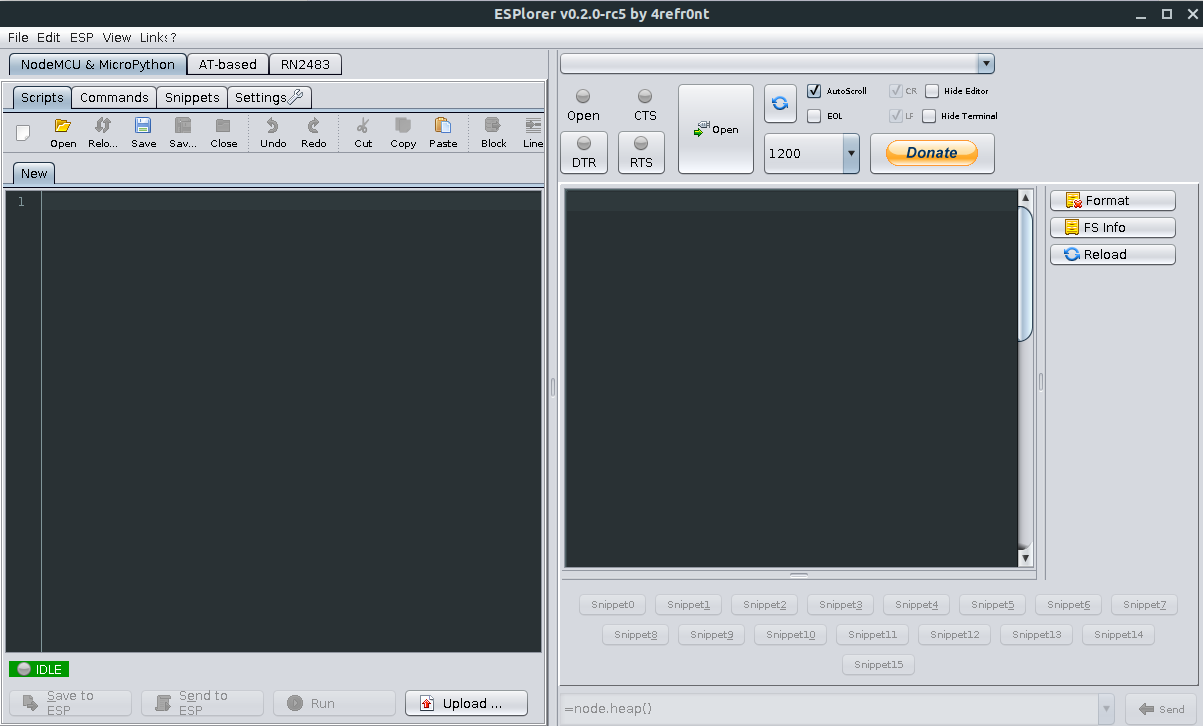
- We can refer to this documentation of NodeMCU to get started with writing lua scripts in ESP8266 modules.
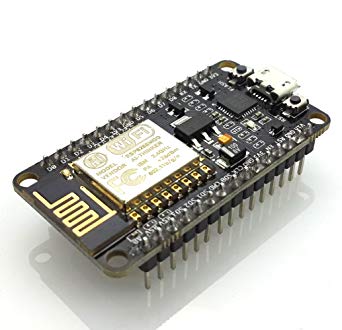
- ESP8266 node that is used in this project can be bought online
- To begin with we can run the following Lua programs:
--configure station but don't connect to Access point (DO save config to flash)
station_cfg={}
station_cfg.ssid="Gaurav"
station_cfg.pwd="kumar123"
station_cfg.auto=false
wifi.sta.config(station_cfg)

--This works only when autoconnect is turned off as done above
cfg={}
cfg.ssid="UpLua"
cfg.pwd="fernando"
wifi.ap.config(cfg)

-- Configure NodeMCU (ESP8266) as a Wifi Hot-spot
--wifi.setmode(wifi.SOFTAP)
cfg={}
cfg.ssid="UpLua"
cfg.pwd="fernando"
wifi.ap.config(cfg)

--connect to Access Point (DO NOT save config to flash)
--wifi.setmode(wifi.STATION)
station_cfg={}
station_cfg.ssid="Gaurav"
station_cfg.pwd="kumar123"
station_cfg.save=false
wifi.sta.config(station_cfg)
Luarocks: Xavante REST server study
Till now we have connected our NodeMCU device to a wifi network which is connected to the internet, now we need to run a restserver on the device to set up a bridge to the google cloud iot core.So, to achieve this we first need to have a test restserver running like the restserver-xavante as described below:
- We can install the restserver-xavante using the following command in the terminal:
$ luarocks install restserver-xavante
- Go to this link and check out the todo-list example in the examples/ directory.
- This server is a Lua Script and the example client exercising the REST API provided by the server is a shell script powered by Curl.
- Now We after running the example todoserver.lua from the examples on the nodeMCU, we can run a few test curl commands OR use postman application to do the same. Some of the commands are:
#!/bin/bash

function say() {
   echo
   echo
   echo "$@"
   echo
}

say "We start with an empty todo-list"

curl -v localhost:8080/todo

say "We add an item..."

curl -v -H "Content-Type: application/json" -X POST -d '{ "task": "Clean bedroom" }' http://localhost:8080/todo

say "...And the list is no longer empty:"

curl -v localhost:8080/todo

say "We add another item..."

curl -v -H "Content-Type: application/json" -X POST -d '{ "task": "Groceries" }' http://localhost:8080/todo

say "...and now we have two items:"

curl -v localhost:8080/todo

say "We can check a single item:"

curl -v localhost:8080/todo/2/status

say "And when we go for groceries, we mark it done:"

curl -v localhost:8080/todo/2/done